This blog will let you learn how to Install Apache web server, MySQL, and PHP on a Linux server step by step so that you can deploy your applications and make them in production mode.
Prerequisites:
Assuming you have a Linux Ubuntu distribution up and running with access to the internet. See How to manually configure the network in Linux Ubuntu.
What is LAMP in Linux
A lamp stack is a collection of open-source software, basically, it is an acronym of Linux, Apache, MySQL, and PHP all these 3 software must work together in order for a dynamic website to run properly. On other operating systems like Windows Apache, Mysql, and PHP can be installed just by installing a single software like WAMP or XAMP.
Step 1. Install Apache Web Server
The Apache web server is an open-source web server, that listens to HTTP requests from a web browser and sends HTTP responses. These responses contain your website files so that the visitor’s web browser can render and be able to run the website. Basically, this is what happens when you enter a website on the internet.
To install Apache first, open a terminal in your Ubuntu Machine. In Linux, you will always need to learn some terminal commands which will be a great skill in your IT kit.
To begin, make sure your APT cache is up to date with the following command:
$ sudo apt update
The Sudo command stands for “Super User Do” is allowing you to have permission as a root, meaning you can install, delete and do other tasks in your Linux similar to what the root (Administrator can do). The apt command is an acronym for Advanced Packaged Tool which is a collection of tools that allow you to do things like install, delete, and update software packages in Ubuntu Debian-like systems.
After the cache has been refreshed, you can install Apache using the following command:
$ sudo apt install apache2
apt will inform you which packages it wants to install and how much more disk space it’ll take up once you run this command. To confirm, press Y and then ENTER, and the installation will begin.
Step 2. Allow Web Traffic Through the Firewall
Next, verify that your firewall accepts HTTP and HTTPS traffic, supposing you have installed apt and Apache. Now, this step is not sometimes necessary but it’s better to adjust your firewall. First, check that the Ubuntu firewall as an application profile for the Apache web server.
$ sudo ufw app list
The output will be:
Available applications:
 Apache
 Apache Full
 Apache Secure
 OpenSSH
Now see apache’s full details, you notice that it uses port 80 and port 443
$ sudo ufw allow "Apache Full"
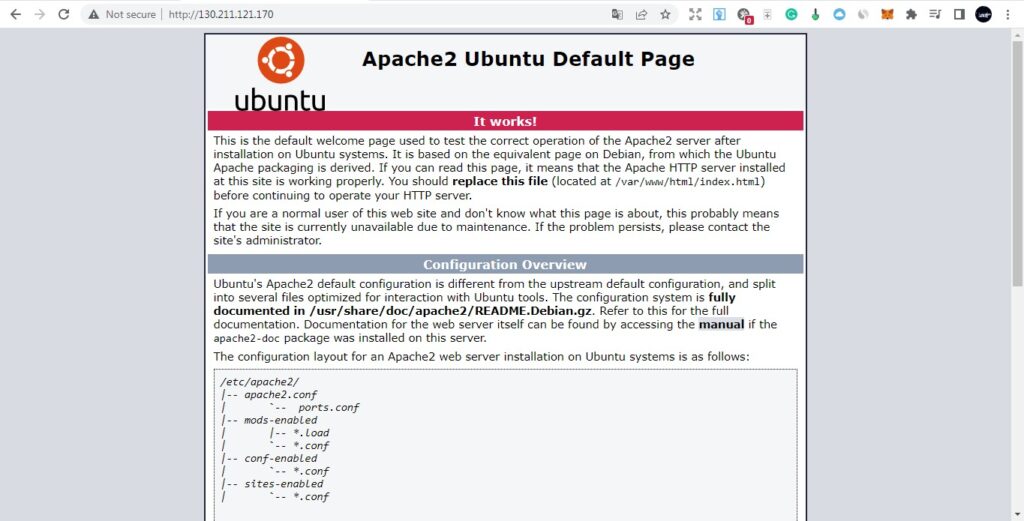
Now go to your browser in your Ubuntu machine or Virtual machine and type the loopback IP address of the machine. 127.0.0.1 But if your Linux server is running on the cloud you can access the server from the internet using your public IP Adresse of the machine.
How to Know you Public IP Address in Linux
You can simply use an external utility that returns your public IP. First, install the curl ” Client URL ” utility and then get your public IP from an external service.
$ sudo apt install curl
$ curl http://icanhazip.com
Step 3. Install MySQL Database
Now the next step is to install the MySQL package on your Linux server. Mysql is a database management system, it allows you to store, manage and access data efficiently. Databases are what make a dynamic website and it’s an important technology to learn as well.
In Ubuntu use this command bellow to install MySQL then type “yes” to continue the installation.
sudo apt install mysql-server
Next, when the package is finished installation, Type this second command to make sure your MySQL is secured. the goal of this command is to change some security defaults with the information you define. This step allows you to set a password for the user of the MySQL database which is basically an administrative user with all privileges. Now choose and remember your password then type “y” yes for all the rest questions.
sudo mysql_secure_installation
Now test if you can access the Mysql console by this command:
sudo mysql
If you see something like this, that means you successfully installed MySQL and now you are interacting as a root in the database.
Now you can exit the MySQL console with the “exit” command.
mysql> exit
To learn how to create and manage a database we recommend seeing this quick tutorial Getting Started with MySQL.
Step 4. Install PHP
PHP is a scripting language mostly used in web development, it is used in the backend and required a webserver to run. for Apache web server will render PHP code and send it back to the client HTML pages so that ht client can access our website.
Again use the apt installer to install PHP in your linux Ubuntu/Debian machine. You need to install 2 more additional packages wth “php” first “libapache2-mod-php” this one to integrate PHP with apache server. The second one “php-mysql” used to connect php to mysql database. To install all these packages and their dependencies at once run the command below.
sudo apt install php libapache2-mod-php php-mysql
Now you may want to modify the Apache index, meaning you specify what type of files will have precedence so for dynamic websites you need to give precedence to the index.php file rather than index.html, this step is still optional just to avoid rendering HTML index files if it is located in your website root directory. To do that, go and edit the dir.conf file and give precedence to index.php.
sudo nano /etc/apache2/mods-enabled/dir.conf
this command will open nano text editor and just move the index.php file to the first of the line just like this.
Before
<IfModule mod_dir.c>
DirectoryIndex index.html index.cgi index.pl index.php index.xhtml index.htm
</IfModule>
After. Now save and close by: CTRL+O then CTRL+X then confirm changes by clicking y.
<IfModule mod_dir.c>
DirectoryIndex index.php index.html index.cgi index.pl index.xhtml index.html
</IfModule>
To finish this process make sure to restart the apache server so that the apache server can collect the changes.
sudo systemctl restart apache2
Step 5. Test PHP Processing on the Web Server
Now that we have installed PHP successfully, we still need to verify if it’s responding and working properly. To do this first create a simple php file info.php in the webroot directory so that it will be executed rather than the default one index.html. by default Apache2 created a root directory located in /var/www/html/ that’s where the generic index.php file is located. now let’s see what can we do
sudo nano /var/www/html/info.php
Now type some php code to see if it works. for example type <?php phpinfo(); ?> in the nano editor so that we call the built in function phpinfo(). you can type any php code.
<?php
phpinfo();
?>
Now go to your browser and type your domain name or “localhost” if you are testing only in your local machine, and then followed by /info.php
Note: make sure you replace domain_name with your domain name.
http://domain_name/info.php
If you see a view like this in the image above know that everything is up and running.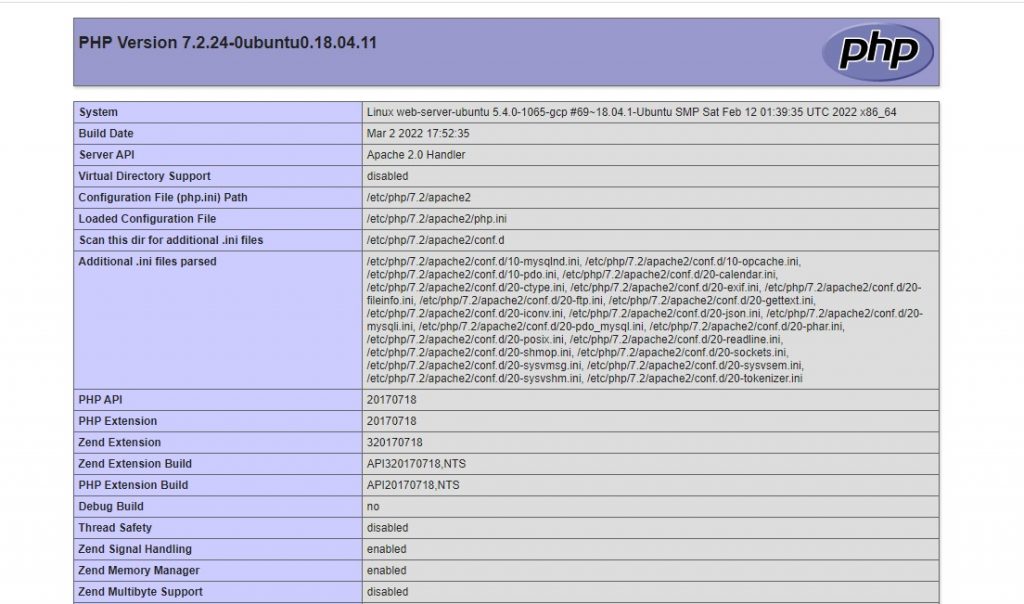
Now start building your PHP project that will change the world.
