In This article, you will discover the solution for Coursera “Using python to interact with the Operating System week 7 final project”. by the way, we do not recommend only copying the source code of the script from here or any other place without making sure you understand what happened inside that script.
we mean exactly this task:
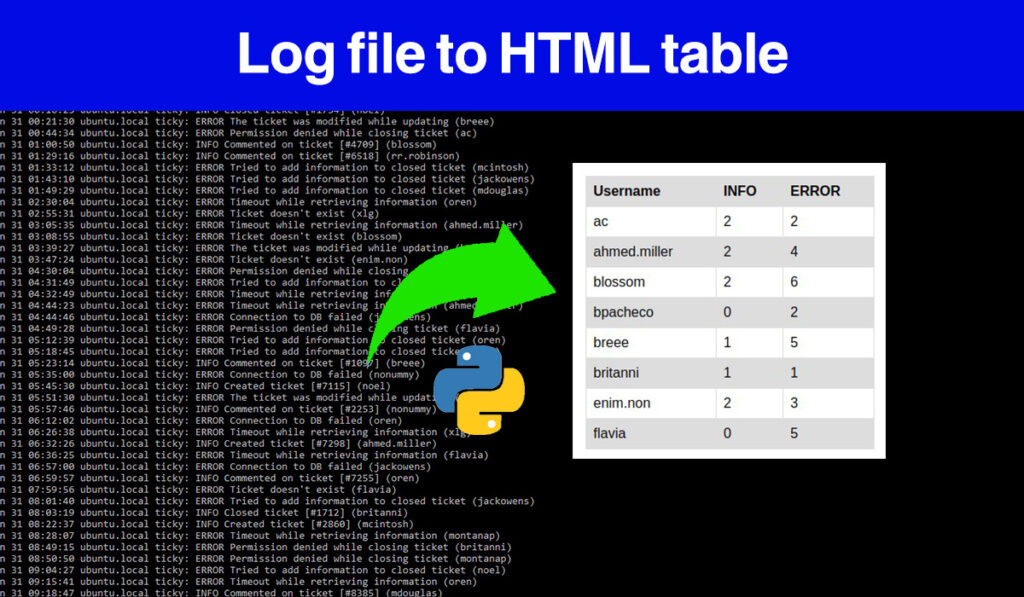
Now, we’re going to practice creating a script, named ticky_check.py, that generates two different reports from this internal ticketing system log file i.e., syslog.log. This script will create the following reports:
1- The ranking of errors generated by the system.
2- The user usage statistics for the service.
Video Explaining the full process:
Python script ticky_check.py to generate errors and user statistics dictionaries
The Coursera final project lab ” Log Analysis Using Regular Expressions “is trying to refresh your mind and give you an opportunity to practice all that you have learned. Starting with using dictionaries to store filtered data, slicing targeted data using REGEX, and also generating CSV files. With the help of the python re module and other modules like sys, operator, CSV. In addition to that google wants you to challenge yourself with this really complicated script for a beginner level.
Python helps to minimize code lines and offers you tools to deal with any complicated programming task.
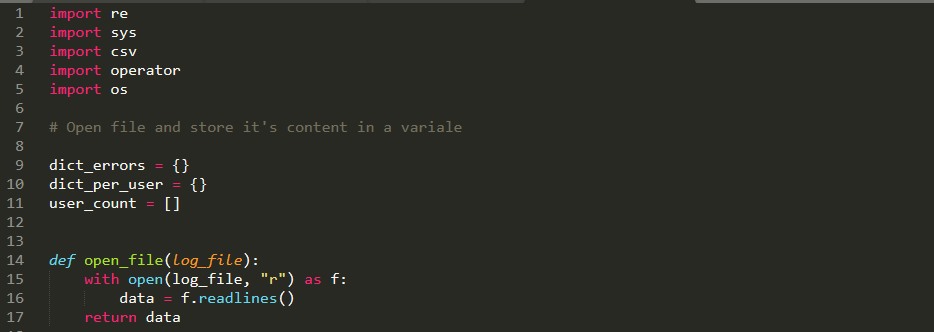
1. Import modules and initialize dictionaries
First, you need to import re, sys, CSV and operator modules to be able to use pre-built code to solve the problem:
- re module: use it to slice targeted strings in each logline.
- sys module: will give you the possibility to pass the log file as a command-line argument to the ticky_ceck.py script using sys.argv[1]
- CSV module: used to generate CSV files after storing errors and user statistics in the dictionaries.
- operator module, we are going to use it to sort data in each dictionary as requested in the lab.
Now initialize 2 dictionaries and one list. you may think why we need the list, well you will see that we used it in the user’s dictionary, there may be other solutions when you will not need it. anyway, move to open the file. In this step, you are free to use functions or you can write your code directly. Now define two functions one for opening the file and another for generating CSV files. we’ve used the main function that can be the first function our computer will execute.
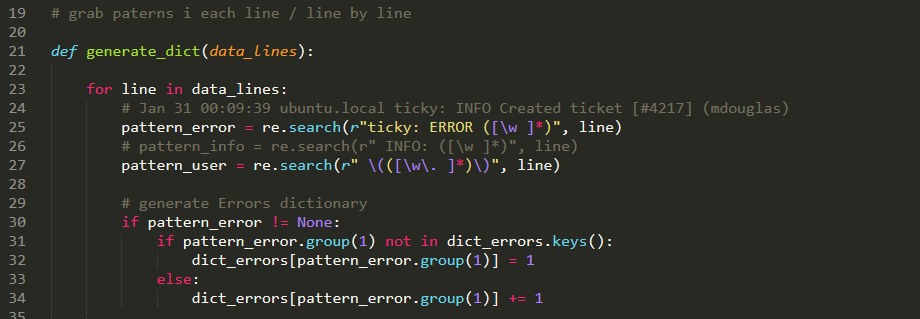
2. Use Regular Expressions ” re ” module to parse a log file
This section of the code is the place where you have to iterate through each line in the log file: so that you can grab the user name/error-info and the error/type in that line. in order to do that you may need t use re.search() function so that you target a group that will contain the segments required in the whole line.
First, grab text after Error by using parentheses () so that you can refer to that part of the line by using “pattern”.group(index) function that is offered by re python module.
patern_error = re.search(r"ticky: ERROR ([\w ]*)", line)
pattern_user = re.search(r" \(([\w\. ]*)\)", line)
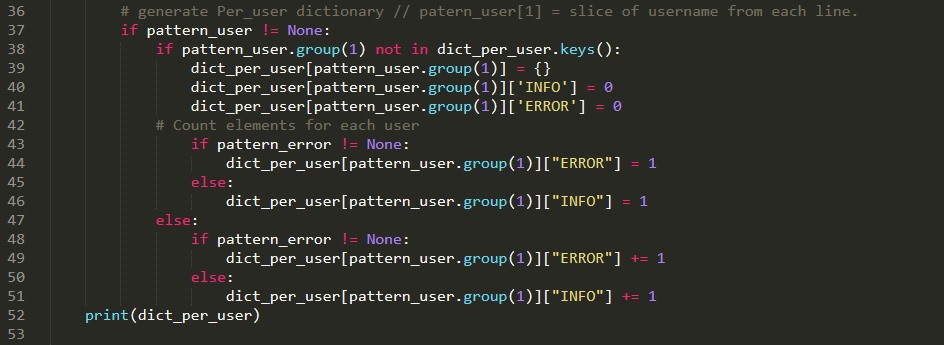
3. Append and modify values in a dictionary
Moving to the next part in our script, where you need to append values to the per_user and errors dictionary. By the way, we will use IF statements in order to filter each line and its content.
- Generating an error dictionary is quit simple in the above image, we did that in just two lines of code.
# generate Errors dictionary
if pattern_error != None:
            if pattern_error.group(1) not in dict_errors.keys():
                dict_errors[pattern_error.group(1)] = 1
            else:
                dict_errors[pattern_error.group(1)] += 1
# generate Per_user dictionary // patern_user[1] = slice of
# username from each line.
        if pattern_user != None:
            if pattern_user.group(1) not in dict_per_user.keys():
                dict_per_user[pattern_user.group(1)] = {}
                dict_per_user[pattern_user.group(1)]['INFO'] = 0
                dict_per_user[pattern_user.group(1)]['ERROR'] = 0
            # Count elements for each user
                if pattern_error != None:
                    dict_per_user[pattern_user.group(1)]["ERROR"] = 1
                else:
                    dict_per_user[pattern_user.group(1)]["INFO"] = 1
            else:
                if pattern_error != None:
                    dict_per_user[pattern_user.group(1)]["ERROR"] += 1
                else:
                    dict_per_user[pattern_user.group(1)]["INFO"] += 1
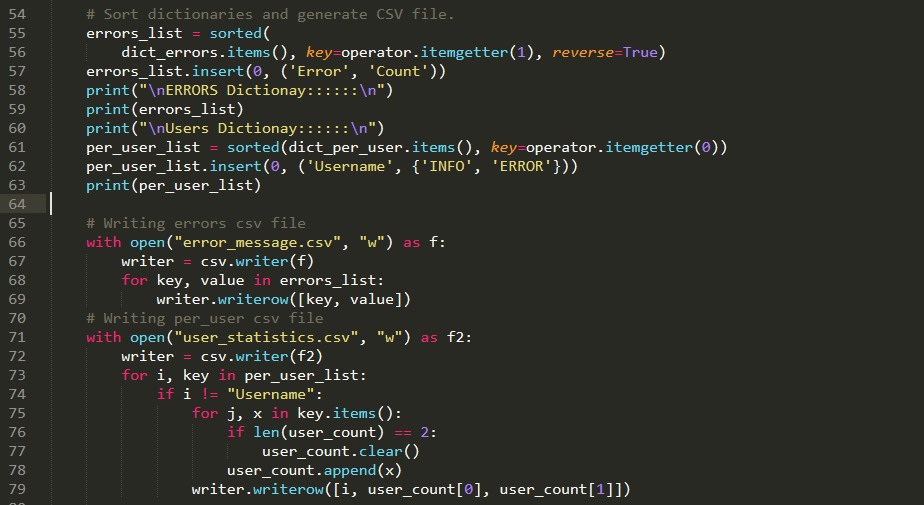
4. Sort dictionaries and write CSV files for each one
If you remember we’ve imported: operator python module, and now it’s time to use it. The code bellow is for soring data in dictionaries:
sorted(your_dictionary.items(), key=operator.itemgetter(1), reverse=True) .
Another important step is to add headers to each one of the dictionaries, after sorting the dictionary into a new list you cant simply insert whatever you want anywhere in the list using the python list.insert() method.
errors_list = sorted( dict_errors.items(), key=operator.itemgetter(1),
 reverse=True)
# insert the header of the table at the begining
errors_list.insert(0, ('Error', 'Count'))

per_user_list = sorted(dict_per_user.items(), key=operator.itemgetter(0))
# insert the header of the table at the begining
per_user_list.insert(0, ('Username', {'INFO', 'ERROR'}))
- Finally, you need to generate CSV files based on the sorted lists: The solution for this is like we did in the code below. Iterate through each element in the list and append its value to writer.writerow() function: the values should be separated by comas.
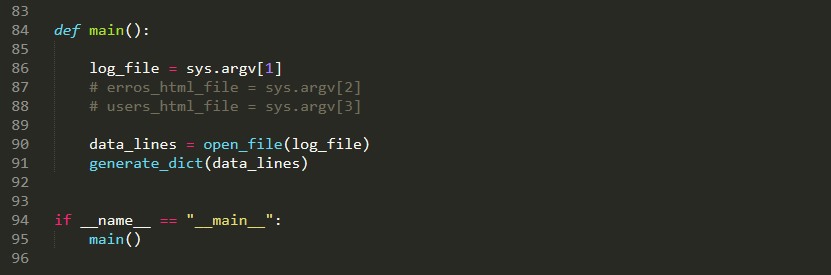
5- Main function and Command-line arguments
Define the main function and initialize a variable (log_file) that will hold the content of (sys.log) that you will pass in the command line argument the first command-line argument.
This command line is from windows OS. So in Linux OS, we don’t need to start with Python, instead, we just type ./ followed by the script name and then by the command line argument.In this case syslog.log file.
![]()
In the Quiqlab lab you will run the script and pass the sys.log file like this :

The second script csv_to_html.py is the second part so that you generate an HTML table from the errors file. Now you can access all the scripts and file here:
Download the entire script from here to test it by yourself.